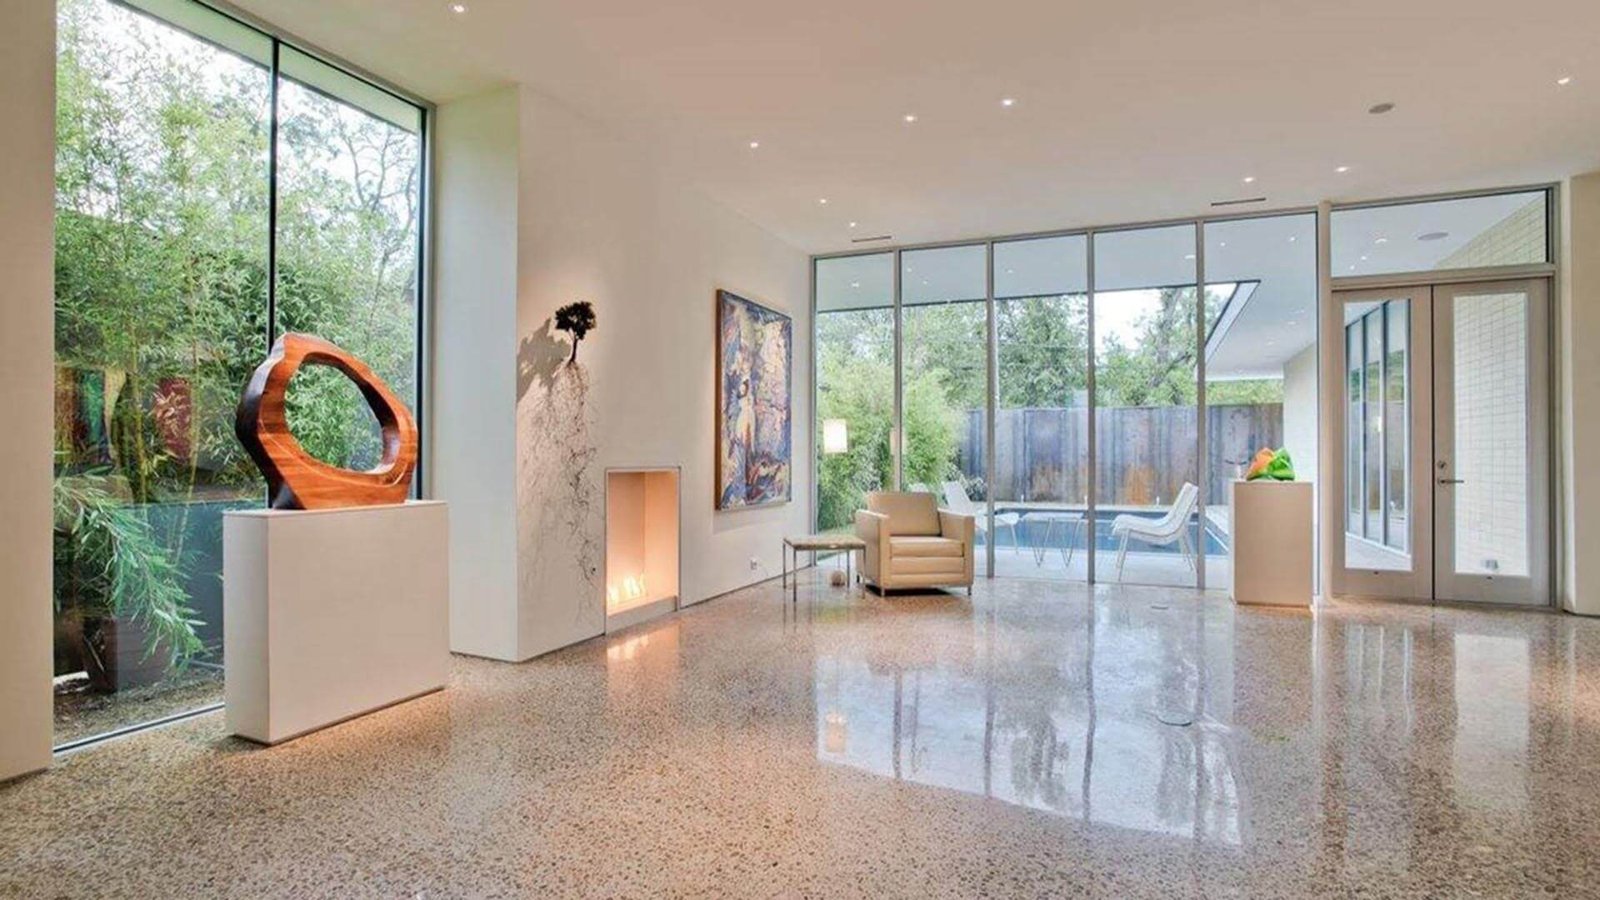
It is nice walking into a room and seeing yourself in the floor. Few flooring materials can top terrazzo, the speckled beauty with a historic pedigree. You found a treasure under an old carpet in a mid-century home, or you want to update the floors in your business; Polish Terrazzo Floors has an appeal that can not be beat. But getting that shine back is never easy. Professional restoration can be expensive, and for the handy homeowner or the budget-conscious business owner, the DIY route is often tempting. The good news? You really can get professional-looking results yourself if you have the patience, the proper tools and some elbow grease. We usually do the heavy lifting at Floor Polish Masters LLC, but we also empower our clients. In case you’re going to roll up your sleeves and take on this project, we would like to be sure you do it right. The industry secrets that we use every day have broken down the entire process from understanding your floor chemistry to the final buff.
The Art and Science of Terrazzo Polishing
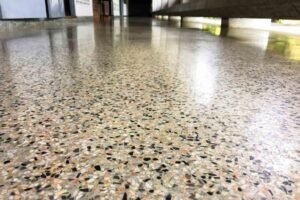
Before you go rent a machine, know what you are trying to do. Terrazzo polishing goes beyond waxing the floor. In fact, people make the biggest mistake of all, trusting wax. The wax acts as a temporary Band-Aid. They stick to the flooring, collect dust, turn yellow, and then peel off. True polishing is actually a mechanical process. That is literally rubbing the stone on a very small scale. Imagine sanding a piece of rough wood until it feels glassy. When it is rough, light bounces off it and all around it, making the floor dull. Polishing it closes those pores and creates a flat surface that bounces light back directly to your eye. That is where the “wet look” comes from—not some chemical in a bottle, but the smoothness of the stone itself. To do this yourself, you’ll need to use a variety of grits, something rough to clean up the surface-to very fine powders to show the luster, from very coarse to very abrasive, to bring out the shine. It’s a labor of love that lasts, the natural shine doesn’t wear off next week.
Knowing the Chemistry of Your Terrazzo Floors
All terrazzo is not created equal. Know what you are standing on to prevent damaging your property. Terrazzo floors generally fall under one of two classifications: decorative and functional. If your home is older, you probably have cementitious terrazzo. This is a mix of marble or glass chips in a cement binder. It is tough but porous. So we tell our clients often: think of cement like a hard sponge. It has millions of tiny holes that love to absorb liquids. You pour red wine or coffee on unglazed cement terrazzo, and it drinks it up! Epoxy terrazzo is more modern. It has resin glue instead of cement. It is thinner, lighter, and less absorbent but still contains natural marble chips. What does this matter for your DIY project? Both types contain acid-loving calcium-based stone (marble). Your foes are vinegar, lemon juice and harsh bathroom cleaners. They produce “etching,” which eats away the polish you are trying to create. Realizing that your floor is a chemical ecosystem is the first step to treating it right
Step One: Deep Terrazzo Cleaning
Dirty floors cannot be polished. Try to grind dirt and old wax further into the pores of the stone and it will look muddy forever if you try to do so. The first and perhaps the most important phase is a deep and aggressive terrazzo cleaning. Remove everything from the room first. We mean everything. Furniture, rugs, and quarter-round trim, you name it, if you want to get thorough. Then decide if there is old wax or sealer on the floor. The yellowed floor and scuff marks that look like they “peel” are signs of wax. You’ll need a pro-grade floor stripper. Mild soap is not appropriate here. Slather on some stripper, and let it sit (dwell), following the bottle’s directions, typically 10 to 15 minutes. This chemical breaks down the old polymers. You will see the water turn milky and gross. This is how the old finish dissolves.
When Is It Time for Terrazzo Refinishing?
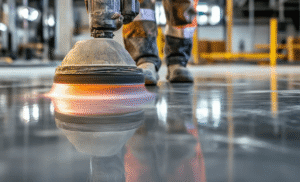
Good cleaning sometimes is not enough. And if you stripped the floor and it still looks stained, scratched, or uneven, you are going from a simple cleaning job to terrazzo refinishing. The top of the stone is usually removed for refinishing to reveal new, undamaged aggregate beneath. On a 40-year-old floo,r there may be tack strip holes, glue residue, and deep stains from oxidized carpet padding. You go so deep with the DIY. Light refinishing witha standard floor buffer and diamond-impregnated pads is possible. You use a lower grit (200, 400) to grind off tougher stains and scratches. What is called the dead layer of stone is removed.
Tackling Chips and Terrazzo Repair
You must check the floor for holes before you begin the final polishing. Those little marble chips will often “pop out” over time and leave little craters in the surface. Polishing over these holes collects dust and water and they turn into little black dots on the floor. Terrazzo repair is tedious work, but manageable. Terrazzo patching kits are available online. The trick is color matching. Both the matrix (the background color) and aggregate (the chips) must match. Pick or brush the hole clean. Or mix your epoxy or cement patch material. If you find chips of matching marble, crush them up & pour them in. Overfill the hole slightly because the material may shrink when it dries. But once it cures (typically 24 hours), you’ll have to hand-sand that spot flush with the floor. Don’t rush this. And leave a hump so your polishing machine can hit it and leave a burn mark. Sanding a dip will make the polisher miss it.
The DIY Process for Terrazzo Floor Polishing
Now comes the fun part: the actual terrazzo floor polishing. For this, you should rent a 175-RPM floor machine (often called a “buffer” or “swing machine”) from your local hardware store. The traditional “old school” way to get that glass-like shine is using a polishing powder, often made of tin oxide or aluminum oxide.
- Prep the Machine
- Make a Slurry
- Buff
- Check Your Work
- Keep it Wet
- Clean Up
This process requires muscle. The machine will want to wander; you have to guide it gently. It’s a workout, but seeing that shine emerge from the sludge is incredibly rewarding.
Is Terrazzo Resurfacing Too Much for DIY?
We touched on this earlier, but its well worth a deeper dive. A distinction should be made between polishing and terrazzo resurfacing. The existing surface is polished. Resurfacing involves grinding down the floor. If your floor is covered with mastic, the black glue used on old tiles or if it is much pitted, you may need resurfacing. For this reason, you need to start with very aggressive metal-bond diamond abrasives. And if that project involves removing an eighth of an inch of stone to get to the good stuff, then Floor Polish Masters LLC can help. We can do all the heavy grinding to grind the floor flat and then do the final maintenance polishing for you to save money. Know your limits or you might ruin a historic floor.
Creating a Schedule for Terrazzo Maintenance
Congratulations! You cleaned, repaired, and polished your floor. It is like a mirror. Now tell me how you keep it that way: Longevity requires a strict schedule of terrazzo maintenance. You need a layered approach. The biggest enemy is dust and sand. Grit is like sandpaper; walking on a dusty floor scratches that polish you worked so hard to get. I dust mop every day. Use microfiber mop instead of a broom. Brooms push dust into the air. Microfiber traps it. Even the best care will wear down the busy lanes. Rent that buffer once/year for a quick screen and recoat or light polishing run. A floor can be touched up much more easily than completely restored.
Achieving that Final Terrazzo Shine
The final touch to your project is the sealer. Once you’ve polished the floor with powder and rinsed it well, any leftover will ruin the sealer; you need to seal in that terrazzo glow. For a popping’ DIY shine, apply two thin coats of a water-based topical sealer. Use a clean microfiber applicator. Lay it down thin and even. If you apply it too thick it will streak and make your face look cloudy. Let it dry completely between coats (an hour or two usually). When the sealer has dried, you can take your buffer and dry it with a white pad and do a final “burnish.” That heats the sealer, and it hardens, giving you that glassy reflection of terrazzo.
Conclusion
Your own terrazzo floors are a big job to polish, but not impossible. It makes you aware of the history of your building & saves you money. The trick? Patience. Avoid cleaning. Do not rush the repair. And lay off that vinegar. But we also know life gets in the way, or the damage is more serious than you thought. Do not panic if you find yourself knee deep in stripping slurry and think you are in over your head. Floor Polish Masters LLC is always available for assistance. So whether you require us to do the heavy grinding while you do the finishing touches, or you would like us to do the whole project for you, we’re only a phone call away.